Creating a WinPE 2.0 CD for Windows deployment
There are a ton of solutions for image deployment and pre-execution environments. The latest deployment services tools provided free by Microsoft are solid and effective. WinPE has been around for awhile and is utilized by many vendors for use in their products (Altiris). While not a full Windows OS it provides a very robust command-line environment that is customizable to your needs. For a graphical alternative to WinPE that provides similar functionality, see Bart's PE.
First thing grab and install the latest Windows Automated Installation Kit (WAIK) for Vista and Server 2008 on what will be considered the "technician PC". Run the WinPE Tools command prompt from the start menu. The first thing we need to do is create the base PE construct which you can do for either x86 or x64 architectures. Note that for the 64-bit artchitecture it is referenced as "amd64".
 You will see confirmation of the copies. Notice that 2 new directories are created:
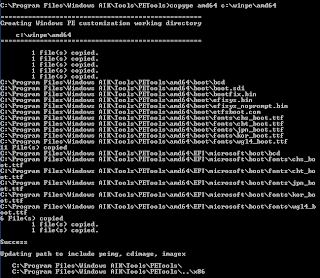
First thing grab and install the latest Windows Automated Installation Kit (WAIK) for Vista and Server 2008 on what will be considered the "technician PC". Run the WinPE Tools command prompt from the start menu. The first thing we need to do is create the base PE construct which you can do for either x86 or x64 architectures. Note that for the 64-bit artchitecture it is referenced as "amd64".
copype x86 c:\winpe\x86
or
copy amd64 c:\winpe\amd64
You will see confirmation of the copies. Notice that 2 new directories are created:- \ISO which will hold the files needed to create the ISO that you will burn to CD
- \mount - empty folder that will house the mouted wim image for modification

You could stop right here, create the ISO and burn your CD but let's customize it a bit first. To do this we have to mount winpe.wim using imageX.
imagex /mountrw c:\winpe\winpe.wim 1 c:\winpe\mount
If you browse now to the c:\winpe\x86\mount (or amd64) directory you will see a familiar construct of a windows file system. Scripts, utilities, or other supported apps can be copied into the file structure for inclusion in the final image. WinPE supports inclusion of some basic packages which will enable support for a few different types of applications. The peimg command is now used to list which packages are available. The "Ins" column indicates if the package is installed or not by the - (not) or + (is) signs.
peimg /list /image=c:\winpe\amd64\mount


Depending on your needs you can install each of these packages for either CPU architecture.

Oddly the imagex application itself if not including in the default WinPE build so it would be good to add this as well. Note that there are versions for both x86 and x64. Copy it from your WAIK installation to your mounted file system:
Imagex is the utility used for image capture and deployment and can be configured to exclude unnecessary files from image capture. Create a new text file in the mounted file system \mount\windwos\system32 and rename it to wimscript.ini.
Paste the following into this ini file and save it:
- FontSupport = additional language fonts
- HTA = HTML application support
- MDAC = data access support
- Scripting = script host support
- WMI = Windows Management Instrumentation support
- XML = MSXML parser support
peimg /install=*HTA* c:\winpe\amd64\mouint\windows
The time zone of your image will also default to Pacific Standard time so if you're not on the West coast here's how to change it:
Once you've installed the packages you need and changed the TZ run the peimg /list command again to verify the changes.
peimg /timezone="Central Standard Time" /image=c:\winpe\amd64\mount

Oddly the imagex application itself if not including in the default WinPE build so it would be good to add this as well. Note that there are versions for both x86 and x64. Copy it from your WAIK installation to your mounted file system:
copy "C:\Program Files\\Tools\amd64\imagex.exe" c:\winpe\amd64\mount\windows\system32
Imagex is the utility used for image capture and deployment and can be configured to exclude unnecessary files from image capture. Create a new text file in the mounted file system \mount\windwos\system32 and rename it to wimscript.ini.
Paste the following into this ini file and save it:
[ExclusionList]
ntfs.log
hiberfil.sys
pagefile.sys
"System Volume Information"
RECYCLER
Windows\CSC
[CompressionExclusionList]
*.mp3
*.zip
*.cab
\WINDOWS\inf\*.pnf
Another optional component worth consideration is the Package Manager utility which can be used to service wim files offline. To include this in your PE build run the following command:
xcopy “c:\program files\\Tools\amd64\Servicing” c:\winpe\amd64\iso\Servicing /s
Once you're done customizing it's time to prepare the image. This process removes all non-installed packages from the final image and reduces its size. This will also seal the image making no further package installations possible.
peimg /prep c:\winpe\amd64\mount\windows
Next unmount the image and commit the changes:
imagex /unmount c:\winpe\amd64\mount /commit
Replace the default boot.wim with the custom winpe.wim you just created:
copy c:\winpe\amd64\winpe.wim c:\winpe\amd64\iso\sources\boot.wim /y
Burn using the best [free] burner there is: ImgBurn
------------------------------------
Alternatively you could create a UFD (USB Flash Drive):
Some additional information about the WinPE environment:
The last step is to create the ISO which you will burn to CD:
oscdimg -h -n -bc:\winpe\amd64\etfsboot.com c:\winpe\amd64\ISO c:\winpe\amd64\winpe_x64.iso
Burn using the best [free] burner there is: ImgBurn
------------------------------------
Alternatively you could create a UFD (USB Flash Drive):
- During a running Windows Vista operation system or a Windows PE session, insert your UFD device.
- At a command prompt, use Diskpart to format the device as FAT32 spanning the entire device, setting the partition to active. For example:
diskpart
select disk 1
clean
create partition primary size=
select partition 1
active
format fs=fat32
assign
exit
where the value of disk 1 is equal to UFD. - On your technician computer, copy all the content in the \ISO directory to your UFD device. You can manually create the directory structure or use the xcopy command to automatically build and copy the appropriate files from your technician computer to your UFD device. For example,
xcopy c:\winpe_x86\iso\*.* /s /e /f f:\
where c is the letter of your technician computer hard disk and f is the letter of your UFD device.
Some additional information about the WinPE environment:
- Basic apps included with PE: regedit, diskpart, netcfg, netsh, task mgr, notepad which all live in \windows\system32
- .NET apps are currently unsupported
- Wpeutil reboot - reboot from PE
- Wpeutil shutdown - shutdown
- WinPE 2.0 is fully backward compatible with older OS versions
- Static addressing can be setup using netsh
- Netsh int ip set address local static 10.x.x.x 255.255.255.0 10.x.x.1
- Map drives using net use
- No DVD+/-RW drive? No problem, boot to PE with a USB drive attached or map to a network location that has the extracted ISO to the OS of your choice. Run setup from that location.


No comments: